
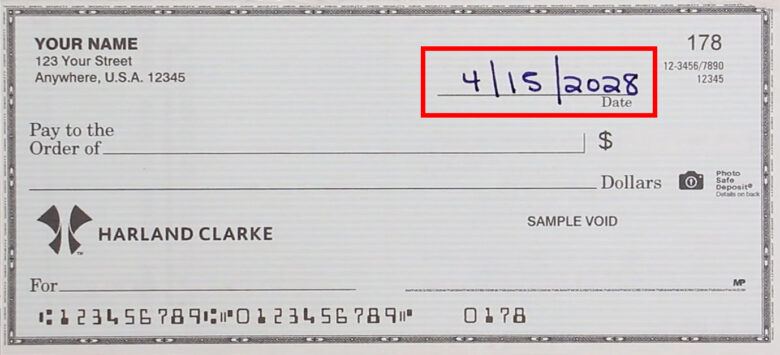
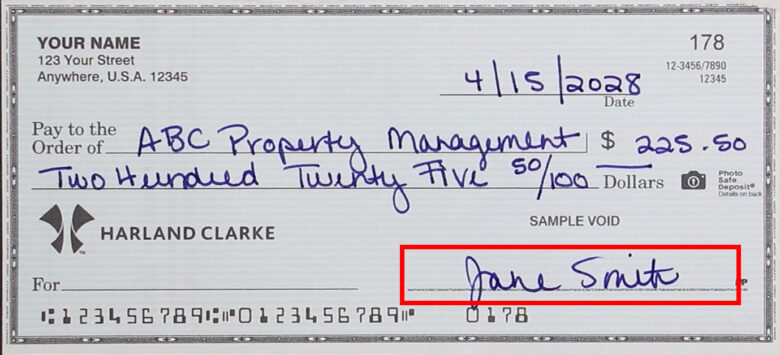
1. The Date Field: Put today’s date, or the date you want the person to deposit the check.
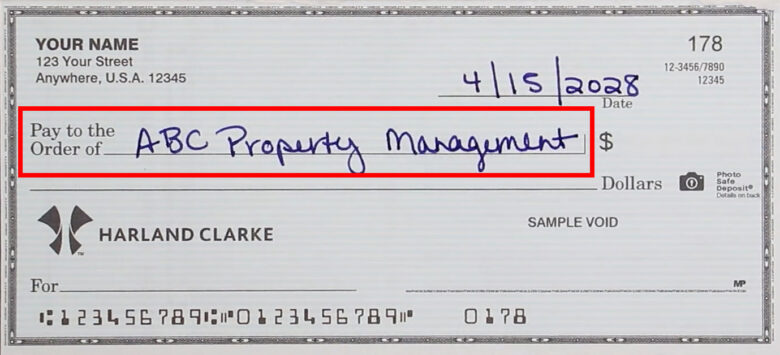
2. The Pay-To Line: Write the name of the person or company who will be receiving the check.
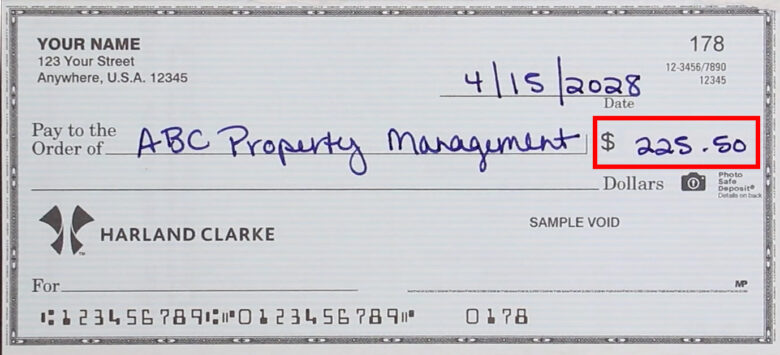
3. The Amount Box: Write the amount using numbers. Start at the left to keep someone from sneaking in a number up front.
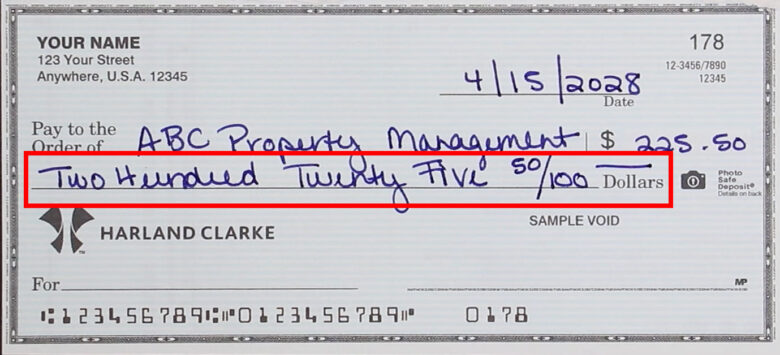
4. The Amount Line: Spell out the dollars just like you would say it and write the cents as a numerical fraction. Draw a line to fill up the rest of the space to keep someone from adding text.
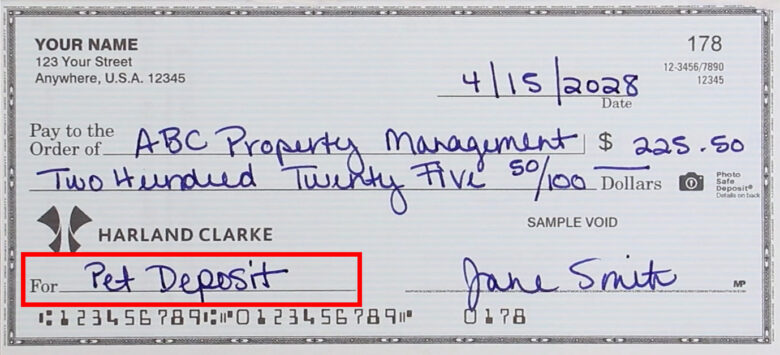
The Memo Line (sometimes called The “For” Line) is optional. Recording a note here can be good to know in the future or for tax records like giving to a charity.
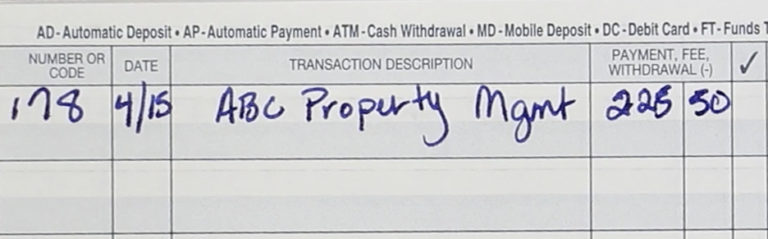
You’ve written the check! Now there’s just one thing left to do. Write the check number (found in the upper corner of the check), the date, the pay-to, and the amount in the check register. This helps keep a record of what you wrote in case someone loses the check or the wrong amount gets deposited. You also have the option of buying duplicate checks that will automatically make a copy of every check you write.
That’s it. You’re all done! But, in case you were curious about those numbers at the bottom of the check – they are special magnetic ink characters with your financial institution’s number (called a routing transit), your account number, and the check number. They help make the check work.

Now that you know how to write a check, do you need to order checks? If so, go to www.ordermychecks.com